
How to Make A Background Color Switcher Project Using JavaScript: A Beginner's Guide
Introduction
For the last few months, I have been learning HTML, Tailwind CSS, and JavaScript.
\
So, I thought of building a project with these to improve my DOM manipulation concepts.
\
In this article, I will be sharing how I made a Background Color Switcher Project.
\
Let's dive into it !!
Prerequisites
The Tech Stack I used for building this project is :
HTML
Tailwind CSS
JavaScript (Specifically DOM Manipulation)
Project Overview
So, let's see what this project is all about.
\
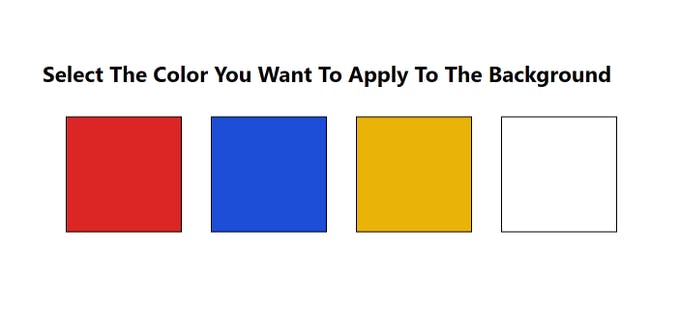
A Background Color Switcher
This project is a background color switcher in which there are multiple color options available (refer to the above image). Here, if you click on any of the colors, it will be applied to the background.
\
I did this using the basic concepts of DOM Manipulation in JavaScript.
\
Now, let's start building the project together.
\
The project will be done in 3 steps :
Setting up HTML Structure
Styling it with Tailwind CSS
Adding functionalities using JavaScript
\
Now, let's understand each of the steps in detail.
Setting Up the HTML Structure
At first, we will be setting up the HTML Structure, and for that, we will be creating two <div>s: one containing the text "Select The Color You Want To Apply To The Background," and the other containing multiple color boxes.
\
In the second <div> we will create four other <div>s that are the color boxes with the respective color class as their IDs.
\
Here's have a look at it
<body>
<div>Select The Color You Want To Apply To The Background</div>
<div>
<div></div> <!-- Extra div -->
<div></div>
<div></div>
<div></div>
<div></div>
</div>
You must be wondering why we have added the extra <div> under the second main <div> (check the above code).
\
We will be looking into this in the following sections.
\
So, that was all about creating the HTML structure.
\
Now, let's add styles to this HTML Page using Tailwind CSS.
Styling With Tailwind CSS
Now, we will add basic styling to our HTML Page.
We will start with adding font style, font weight, and basic padding to the heading.
Select The Color You Want To Apply To The Background
\
Then we will add the required border, background color, width, and height to the color containers.
\
We will also add an id to all the color containers, and in this example, we have kept it the same as its color class
<div class="flex flex-col space-y-5 justify-center items-center pb-10 md:flex-row md:space-x-8 xl:space-x-12">
<div></div> <!-- Extra div -->
<div class="border-black border-2 w-48 h-48 bg-red-600 button" id="bg-red-600"></div>
<div class="border-black border-2 w-48 h-48 bg-blue-700 button" id="bg-blue-700"></div>
<div class="border-black border-2 w-48 h-48 bg-yellow-500 button" id="bg-yellow-500"></div>
<div class="border-black border-2 w-48 h-48 bg-white button" id="bg-white"></div>
</div>
Now, let's get into the use of the extra div (Check the above code)
\
We have used the extra div to align the color containers at the same level so that the space-y-5 or space-x-8 property works properly as this property is applied only in between the elements not at the starting.
Adding Functionality With JavaScript
We all know that functionality can be added to the project using a script tag (which contains the JS code) within the body tag.
Now, let's add the required functionality step by step.
\
Firstly, we will select the color containers using their class="button" and the body element on which the color is going to be added using query selectors.
buttons = document.querySelectorAll(".button");
body = document.querySelector("body");
We need to run a loop on the buttons thus, fetching one color container at a time.
\
Now, we will add an event listener on the selected color container that will specify its work upon clicking on it.
buttons.forEach(function(button){
button.addEventListener("click" , function(e){
//Code to be executed on clicking
})
Now, let's define the function(e) which contains the main code to be executed on clicking on the color container.
\
Inside the function, at first, we call a function named removebg
\
It will take the body element as the argument and will remove any existing bg-color class from the class list of the body element.
\
We did it so that on clicking on a new color container new class can be added to the class list thus giving the body a new background color every time.
\
We will be defining this removebg function further.
\
After calling the removebg function any existing bg-color class will get removed from the class list.
\
Then we will add the required color class (which is present in each element's id) in the body element's class list.
buttons.forEach(function(button){
//console.log(button);
button.addEventListener("click" , function(e){
removebg(body); // remove bg color from target element
body.classList.add(e.target.id); //Add the required bg colour
})
\
Now, the last part that remains is to define the removebg function.
\
This function will accept the body element as a parameter which is stored in the variable sourceElement.
\
Next, we will define a variable sourceClasses that makes an array out of the classes present in the sourceElement.
\
After that, we will run a loop on the array sourceClasses selecting each class, checking whether the class name starts with "bg-" and if that matches, then we will remove it.
const removebg = (sourceElement) => {
let sourceClasses = Array.from(sourceElement.classList);
sourceClasses.forEach(function(className) {
if (className.startsWith('bg-')) { // check if class has any background color class
body.classList.remove(className); // remove bg color from target element
}
});
}
And with that, we have successfully built a background color switcher.
\
The link to the GitHub repository containing the whole code and the project website link is attached at the end for your reference.
Testing the Project
After the code completion, I ran it locally using the npm package and then also deployed the project using Vercel.
\
Here's a preview of my project:
https://olibhia-bg-color-switcher.vercel.app/?embedable=true
Here's the GitHub Repository containing the whole code:
https://github.com/OlibhiaGhosh/WebDevProject1.0?embedable=true
Conclusion
That was all about the code of this project.
\
I hope I made it simple for all.
\
If you found this blog useful and insightful, share it, and comment down your views on it.
\
Do follow for more such content.
\
Here's how you can connect with me.
Email - [email protected]
Socials: Twitter
LinkedIn
GitHub
\
Thanks for giving it a read!!
Welcome to Billionaire Club Co LLC, your gateway to a brand-new social media experience! Sign up today and dive into over 10,000 fresh daily articles and videos curated just for your enjoyment. Enjoy the ad free experience, unlimited content interactions, and get that coveted blue check verification—all for just $1 a month!
Account Frozen
Your account is frozen. You can still view content but cannot interact with it.
Please go to your settings to update your account status.
Open Profile Settings